Wednesday, April 15, 2015

NEACT March Meeting

Graph of pressure vs. volume data collected at the workshop.
The March meeting of the New England Association of Chemistry Teachers was a great introduction to the use of modeling in a chemistry classroom.  We had two knowledgable presenters, Sue Kelmmer from Camden Hills Regional High School and Tom Pfeiffer from Bellow Free Academy, who gave us two different sides of the modeling story.

I LOVE these giant white boards.  Each lab table had one in the middle.
Sue started off the morning with a presentation about using particle diagrams to tackle student misconceptions in science class.  She opened the discussion with a modeling probe she used in her classes:  cutting copper probe.  

Consider a length of pure copper wire.  Cut the wire in half and throw away one of the two shorter wires.  Now take the remaining piece of wire and cut that in half, and throw away one piece.  Continue in the same way , each time cutting half of the remaining wire.  Will this process come to an end?  Explain your answer with a diagram.

Each lab table was equipped with large white boards, so we jumped right into the solution for this prompt.  The discussion at my table centered around when (and if) the kids take the diagram from the macroscopic to the atomic/particle level.  Sue presented several diagrams her students had generated from this prompt, which clearly illustrated the range of thinking in her classes and the "ah ha" moments that happened when students took the solution to the atomic and subatomic level.

Sue gave us plenty of great examples demonstrating how and when she incorporates particle diagrams into the curriculum.  She shared some of her favorite resources with the group.  Her "go to" book for formative assessment probes is Uncovering Student Ideas in Science, Volume 1:  25 Formative Assessment Probes by Page Keeley.

Sue Klemmer and Tom Pfeiffer presented their modeling work at the March NEACT meeting.
The second half of the morning was dedicated to a modeling activity of the gas laws.  Tom gave us a brief overview of the modeling learning cycle, which is very different than the particle diagram models you imagine when the word is used.  The modeling technique is popular in both physics and chemistry; you can read more about the technique at the American Modeling Teachers Association website.  Tom is an instructor for the chemistry modeling workshops this summer in Mass. and CT.  The modeling approach involves student exploration of a system, and then the application of the system to solve a problem.  In our case, we conducted three quick experiments to explore the relationships between pressure, volume, temperature, and moles of gas.  We set up each experiment with a Vernier probe and hand held LabQuest device.  These handy devices make for very quick and accurate results.  Tom asked us to plot our group data on the giant white boards; I was happy to use mine again!  The final part of the workshop was reporting our results to the group and discussing the application of the relationships we learned.  Here's where the years of experience in the classroom really became evident as we listened to an interesting discussion about blending the modeling techniques with the particle diagrams.  This one-hour hands-on session made me very interested in signing up for one of the summer courses to learn more about using modeling in the chemistry classroom.  You can find the list of summer workshops here  AMTA Summer Workshops 2015.

Thanks to Tom, Sue, Sawn, Mel, and Mary for hosting this fun and inspiring morning.  I love getting together with fellow chemistry teachers to share ideas and get a boost of excitement about our craft.  At the tail end of a very long and snowy winter, I was very happy to make some new friends and talk science on a Saturday morning.

The next meeting is on May 2nd.  The description of the program from the website:

Join us on the beautiful Regis College campus in Weston, MA to share and comment on your experience with online sources for chemistry education and flipping the chemistry classroom.

I hope that I can clear my calendar to go to this one!  This might be a good distraction for me on the day before I run the Providence Marathon.
Big thanks to Shawn Kenner who coordinated the event.

Mel Govindan is the president-elect of NEACT

Mary Christian-Madden is the current president of NEACT.


Friday, April 10, 2015

Burning Potato Chips for Science

Burning potato chips in the lab in our calorimetry experiment.
There is no better way to teach kids about energy content in food than to burn some in the lab.  Thermochemistry has become one of my new favorite topics to teach because of the many "real world" applications that make the topic relevant and fun.

It is shocking how well the potato chips burn!
I've changed the focus of the unit to a lab based experience with supporting video content that the students watch for homework.   The inquiry cycle works very well in this unit.
This group is working on the Calorimetry POGIL with the mole at the table for help.
The first stop is a calorimetry POGIL, the second phase is measuring J/g for a candle, and the final piece is an inquiry lab to determine how many potato chips must be burned to boil a pot of water.  Each part of the process reinforces the idea of energy transfer.
Measuring the heat content in a candle to learn the calorimetry technique.

The challenge problem for the potato chip experiment is to determine the mass of chips needed to take a cup of water from room temperature to completely boiled away.  This problem forces the kids to consider to energy requirements of the phase change in addition to heating water to the boiling point.  If your curious, it takes about 200 grams of potato chips to boil away a cup of water.

Monday, March 9, 2015

My Own Winter Term Comment

At NAIS Conference with my friend and mentor Ellen on the last day of the winter term.
I just finished writing winter term comments for my students.  I thought it only fitting to write one for myself.  Here it is.  I think I got an A- for the term.


Sharon had a good winter term with her chemistry students.  This term she was faced with the significant challenge of teaching the mole concept to her honors chemistry students.  Although this is a challenging unit to teach for many reasons, (including, but not limited to, the fact that kids just don't understand it, and it can be a bit dry) Sharon rose to the occasion with a new stuffed mole to lift everyone's spirits.  This class mascot served as good moral support for the students as they worked through mole problems on white boards and in the lab.  She also chose to start the AP Chemistry term with electron configurations and periodic trends.  What was she thinking?  Coupling this abstract unit with the mole concept is virtually a perfect storm for frustration because these are the least exciting parts of any chemistry course.  There was an audible sigh of relief from Sharon and her students when both classes moved on to the next topics.  The celebration was short lived in her AP class when the students learned that kinetics and equilibrium were on the agenda for the rest of the term.  Even though her students were having difficulty with the integrated rate laws, Sharon was once again in her element with this data-drive, lab-based unit.  She continued the article review project this term with only the honors classes.  Although she started the term with a renewed sense of purpose for this science literacy project, she had difficulty sustaining the attention for details needed to really pull it off.  Her improvements to the project this term included a shared google doc to track the articles each student chose, student choice of a week for their due date rather than one day in the term, blocking out vacation weeks and mid-term weeks from the schedule, and allowing students to work with a partner on the assignment.  These changes were steps in the right directions for implementing a rich experience for the students, but she lacked the follow through necessary to really pull it off.  However, the article tweets on the class Twitter feed were very popular amongst her followers and often favorited and retweeted.  Overall, Sharon conducted her classes with attention to safety, an eye for fun, and an intensity that helped to warm the hearts of her students during this ridiculously cold and snowy New England winter.

Wednesday, February 11, 2015

Equilibrium Games are a Win

Water transfer equilibrium analogy.
I haven't taught equilibrium for nearly ten years!  This time around I decided to tackle the conceptual understanding of equilibrium first with three different analogies and a POGIL activity before even mentioning the words "equilibrium expression".  The outcome has been very positive from my perspective, even though my AP Chemistry students are not always eager to volunteer to be a reactant or a product in my activities.

The first thing I did was show the students the "Red Pill or Blue Pill" clip from the Matrix.  I likened equilibrium with taking the red pill because you have to open your eyes to the real world of chemistry.  We can no longer pretend that every reaction goes all the way to completion!  Maybe this scared the kids more than amused them, but I found it very funny.

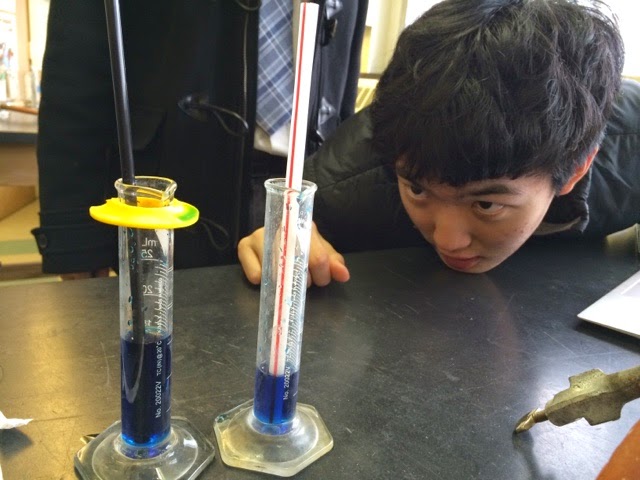
Using two different sizes of straws to transfer water.
The first equilibrium analogy we did was the famous water transfer reaction with two different sized cups.  I labeled two large bowls "reactants" and "products".  The reactant side was filled half way with blue water and the product side was empty at the beginning of the reaction.  Two students volunteered to transfer water from reactants to products or from products to reactants, each using a different sized beaker (I used a 50 mL and 250 mL beaker).  When the reaction began, the product to reactant transfer was very small, but steady gained in volume as the reaction progressed.  Meanwhile the reactant to product transfer started large and gradually shrank.  After every 5 or 6 transfers we tested to see if we had reached equilibrium by measuring the volume of water transferred in each direction.  This simple and fun demo was an excellent kick off to the conceptual understanding of equilibrium.  When it was over my students understood that equilibrium is reached when the forward and reverse rates are equal, not necessarily when the amount of reactant and product are equal.

Now the students were ready to put some numbers to their water transfer equilibrium analogy.  The students conducted the classic experiment with two graduated cylinders and two different sized straws.  They used the straws to transfer water from one graduated cylinder to the other, each time measuring the volume in the two cylinders.  (By the way, McDonalds has really large straws that are perfect for this activity.)  The result is a beautiful graph of the concentration of the "reactants" and "products" as they approach equilibrium.  It only took about six transfers for the system to reach equilibrium, which was just about all the patience my students had for the water transfer with drinking straws.  I loved how the volume in each graduated cylinder was different at equilibrium, even though the amount of water transferred was the same.
Checking the volumes at equilibrium.

Penny transfer equilibrium activity.
The third activity on the opening day of equilibrium involved another transfer reaction, but this time with pennies.  The students labeled one dish "reactants" and another dish "products".  Staring with 42 pennies, they transferred pennies at a fixed rate in both directions.  Once again, the reaction started with all reactants and it gradually reached equilibrium in approximately six transfers.  In this activity, the students kept the transfer rates constant (1/4 for the forward reaction and 1/3 for the reverse reaction), but they experimented with changing the initial conditions.  They tried starting with more reactants, all products and no reactants, and an even split between products and reactants.  They also added reactants to a system at equilibrium to see how that would change the equilibrium "concentrations".  Through these variations of the penny transfer analogy, the students could see with their own eyes (and data), how a reversible reaction will reach equilibrium from many different starting conditions.

On Day Two of our equilibrium unit, I split the kids into groups of three or four and gave them a POGIL to work through.  The POGIL activity inched them a little closer toward the equilibrium expression because the examples were based on a chemical reaction ( A <-> B).  This activity is also data driven, similar to the penny and the straw water transfer, but using moles of A and B.  Each student was given a different set of starting conditions for one of two equilibrium systems.  By sharing their results, the class derived the results necessary to calculate the ratio of products to reactants.  The POGIL was the perfect transition from the reversible reaction concept to an equilibrium expression calculation using molarity, and determining the increase and decrease of the species in the system.
The class agenda for Day Three of the equilibrium unit.

On Day Three I taught the kids how to write an equilibrium expression and use it for calculations.  I was so pleased at how quickly they mastered this new skill.  I believe that the two days of hands-on activities and equilibrium analogies gave them the perfect conceptual groundwork for understanding the equilibrium expression.

Adding stress to the system by inhibiting the decomposition reaction.
The fourth and final equilibrium analogy was the "tank equilibrium".  The forward reaction volunteer assembled a film canister from a canister and a lid.  The reverse reaction volunteer took the canister apart.  All of this wass happening in a fish tank.  This fun game was the perfect introduction to Le Chatelier's Principle.  At some point in the "reaction", I dumped more product into the mixture.  The  reverse reaction picked up steam and generated reactants more quickly.  Later, I blind folded just the reverse reaction volunteer to see how this would change the equilibrium conditions.  Overall, this demo was a lot of fun and sparked the conversation about stress on a system.

Tomorrow we will head into the lab for the AP Chemistry lab kit exploring Le Chatelier's Principle using real chemical reactions.

Note:  these activities are all available on the Flinn e-learnig video library.

Sunday, February 8, 2015

Kinetics and Guided Inquiry Are Not Good Friends

I just wrapped up a three week unit on kinetics with my AP Chemistry students.  As part of the unit we attempted two kinetics experiments from the set of sixteen recommended labs in the AP Curriculum.  The first one was the Rate of Decomposition of Calcium Carbonate, and the second one was the Kinetics of Crystal Violet Fading.  Both of these experiments exposed the students with the data-driven nature of rate laws, using two different techniques.  The difficulty I faced was trying to push my students towards inquiry without telling them what to do!  Let's face it, teachers like to tell their students what to do.  When a lab group starts floundering, I nearly have to restrain myself to keep from bailing them out too soon.  But with the kinetics experiment, my students struggled to understand how to collect the data in a reproducible and consistent way.  With only one week of kinetics under their belts, my students struggled to understand what data to collect, and then what to do with it to derive a rate law for the reaction.  Add equipment difficulties to the conceptual challenge of this experiment and the results can be very frustrating and confusing to my chemistry students.

The first lab we tackled was the Rate of Decomposition of Calcium Carbonate.  I used the Flinn kit and lab handout, Publication No. 7648.  The experiment is actually pretty straight-forward:  students react solid calcium carbonate, in the form of marble chips, with hydrochloric acid.  The goal of the lab is to determine the order of the reaction with respect to HCl.  By changing the [HCl] the students can plot the data and determine the effect of the concentration on the rate of a reaction and calculate the order, in the end writing the rate law for the reaction.    In the introductory activity the students all ran the experiment using 6M HCl.  The reaction rate was monitored by measuring the gas produced from the reaction using a plastic syringe to trap the gas.  We ran into problems right away!  Only one group got decent results.  The syringes leaked or stuck to the sides, which prohibited them from getting an accurate measure of the volume of gas produced.  The one lucky group with the working apparatus was so pleased with their work; they had a lovely graph of the progress of the reaction.  The other three groups fooled around with their apparatus until the leaking stopped and the plunger was free to move, eventually resulting in something that resembled a typical graph of reaction rate over time.  At the end of day one, only one group walked away smiling, the other three were very frustrated and annoyed that their apparatus failed.  (Next time I'll try water displacement to collect the gas.)

After some discussion of the results and the goal of the experiment on Day 2, we charged ahead to the guided inquiry part of the experiment.  In this phase of the lab, the students were asked to design an experiment to determine the effect of concentration on the reaction rate.  It was obvious to me:  run the experiment again with different concentrations of HCl (and I just happen to have 2 M , and 4 M HCl prepred for you...).  The only catch was that two of the groups had to monitor the rate of the reaction by measuring the loss of mass of the system, while the other two groups were required to measure the volume of gas produced (just like the introductory activity).  To make it fair, I had the groups draw from the lucky beaker to determine what direction they would go with the experiment :  mass or volume (I included one "wild card" allowing the group to choose).  At first, the groups that drew the mass cards were annoyed that they had to change the experiment.  However, the leaky gas collecting apparatus made for a very difficult experiment for the groups who got the volume cards.   Even the lucky group from Day 1 was foiled by leaky and uncooperative syringes in the guided inquiry phase.  Adapting the experiment to measuring mass took some tweaking, but produced decent results if the reaction mixture was stirred consistently.  The volume groups limped along with the experiment, getting mostly straight line plots for their reaction progress, rather than a graceful curve.  In the end, the data proved to be consistent in three of the four lab teams regardless of the technique they used.

I walked away from this experiment with another good reminder of how difficult inquiry is for both the students and the teachers.  These students in my AP Chemistry class are the best science students in the school, who are experts at solving problems in class.  However, when I put them in the lab without step-by-step instructions, they struggle to create a solution.  What I need is MORE TIME to develop the lab skills and hands-on problem solving that the students gain from inquiry.

In the interest of time, I decided to use a step-by-step procedure to conduct the Kinetics of Crystal Fading experiment.  In this experiment, the students used spectroscopy to monitor the color change over time of the blue dye when it reacts with hydroxide ions.  I have a set of Vernier colorimeter probes in my lab, and the software package on Logger Pro includes this experiment.  I chose to go with the "standard lab experience" for the spectroscopy data collection.  I'm so glad I made this choice because something happens to students when you say the word spectroscopy.  They get this fearful look on their faces and they groan audibly.  Why do they dread this wonderful lab technique so much?  Maybe it's the "black box" effect, with this machine taking readings that they don't understand.  Maybe it's the quantity of data produced that they have to graph.  Maybe it's the new terminology that throws them off.  I'm not sure, but I saw it happen to my students with this experiment.   Even with step-by-step instructions, the lab took two days to complete!  The nice outcome here is that all the groups got beautiful data from the experiment that they could analyze using the integrated rate law graphing technique. I was happy to have real data to analyze, rather than another set from the book.  I'll save the guided inquiry for another day, and just tell them how to do the spectroscopy experiment for now.  Maybe I'll have them design their own lab using this technique AFTER the AP exam.

Thursday, January 29, 2015

When Kids Cheat...

Cheating is such a frustrating part of my job.  I know that kids cheat on homework assignments and lab reports.  So I have to work to safeguard my assignments from mindless regurgitation of facts.  I need to create assignments with answers that cannot be googled.  I have to make up ways for students to demonstrate their knowledge that is different from what I did last year because most of my assessments are electronic and "out there" on student machines.  With my AP Chemistry class, I have to record all the past questions I've used to prevent reuse in less than four years.  And, shame on me for assigning the questions from the lab kits, those answers are all easily googled in seconds.  I have moved toward collaborative lab report writing because the most frequent cheating cases were from one lab partner copying another.  Now I have students write the report together, in class, so that they can develop their ideas as a team.  Working towards "cheat proof" assignments only gets me so far.  What really bothers me about the academic dishonesty problem is the emphasis on earning a grade rather than actual learning.

As a teacher I work very hard to create engaging learning experiences for kids.  My heart goes into labs and demonstrations to find many ways to help kids to learn difficult chemistry concepts.  But there's always that point where the fun stops and the kids have to demonstrate what they've learned.  Inevitably there's the question, "Is this on the test?"  I know that sounds so cliche, but kids ask it all the time!   To say my kids are grade motivated is an understatement.  Kids in my class will ask to revise their work, do test corrections, or re-work homework problems.  I should be thrilled by this extra effort, but in the end it's just another attempt to earn a grade, not learn the chemistry.  Do kids actually care about learning?  The pressure to get an A on their transcript is very real and in the forefront of my students minds.  Somewhere along the way they traded in their excitement for learning for stress about GPA.   I wish that I could infuse them with some of the joy that comes from learning something new.  Wouldn't it be great if I could tap into the curiosity and excitement that you see in an elementary school classroom, the same energy these high schoolers had only a few years ago.

When kids cheat on their work, I am reminded that my job as a teacher is a complicated balancing act.  I want to foster exciting learning opportunities while upholding a standard of mastery of the chemistry.  All of this is happening in short segments of time that, for my students, is crammed between five other demanding classes with teachers just as eager to inspire and motivate them to master their subjects.  Place that in the context of a boarding school experience that includes sports, dorm life, and social events, and it's no wonder kids are looking for a quick way to get to the end of an assignment.  Drinking from the fire hose, you might say.  Throw in the competition for college admissions and you have the perfect storm of stressed out teenagers.  In the face of what seems like an impossible task, I am trying to keep my focus on learning.  I want to challenge my students to learn; and if they enjoy the process, great, and if they walk away thinking "Chemistry is pretty cool", then I've succeeded. 

Wednesday, January 14, 2015

Blow the Lid Off of Magnesium Oxide Lab

Magnesium reacting with oxygen in a red-hot crucible
Photo by Julia Paneyko
Every chemistry student makes magnesium oxide in the lab in their introductory course.  My students do it twice in my lab program:  once in the study of chemical reactions (types of chemical reactions lab) and then again in the mole unit.  High school chemistry students around the world are determining the chemical formula of magnesium oxide in this classic experiment.  I use this experiment as my first "mole concept application".


The procedure is very simple:  heat magnesium in a crucible until it is fully reacted with oxygen.  Use the mass data of the magnesium before reaction and product after reaction to calculate the mole ratio of Mg and O in the compound.  This mole ratio is the experimental chemical formula of magnesium oxide.  My "go to" procedure for this lab is found in ChemTopic Labs Volume 7:  Molar Relationships & Stoichiometry by Flinn.  In Flinn's version of the lab, there are detailed instructions to heat the magnesium with the lid on, then open the lid every three minutes, and then heat it some more with the lid at a tilt.  All of this manipulation of the crucible lid invariably results in at least one dropped and broken lid each lab period.  And, the results of the lab are usually not that great, with many groups getting ratios other than the expected 1:1.

My students are heating their crucibles with lids off.
This year I decided to try the lab with no lid on the crucible during the heating process.  It seems only obvious to let the maximum amount of air into the reaction by just leaving it open for the whole reaction.  I was a little nervous that burning magnesium might pop out of the crucible, but that didn't happen all day.  The hardest part of the experiment was adjusting the bunsen burner so that it would get hot enough to start the reaction.  Most of the reactions burned at a steady rate, without a big flare up of bright light.  Once the reactions were completed without any safety issues, my students crunched the numbers.

Here's where the big payoff was obvious.  The lab results were much better this year, with most groups getting the expected 1:1 ratio without the need for sad stories about experimental errors in the conclusion.  Taking the lid off resulted in better results, more interesting observations during the reaction, and better results for the chemical formula for magnesium oxide.