Sunday, April 26, 2015

Pitching the Hot or Cold Pack

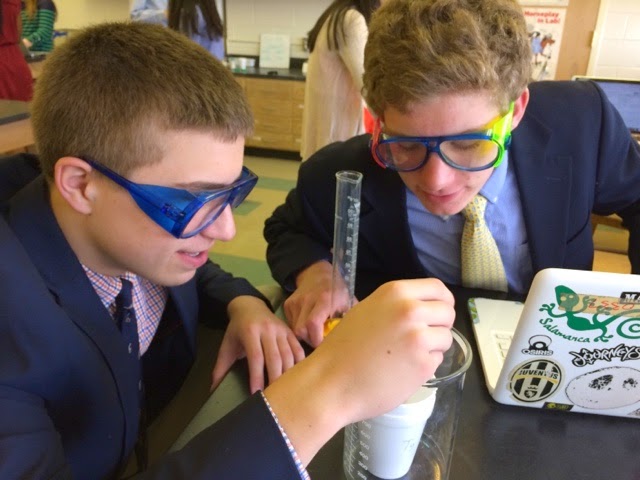
Measuring temperature change when dissolving an ionic compound.
The final project for the thermochemistry unit is the "Hot or Cold Pack Design Challenge".  This project is a good culminating event for the unit because it ties together calorimetry and energy exchange into a relevant application.  (read more about the unit here)  The project involved conducting an experiment to measure the heat exchange produced by dissolving a selection of ionic compounds, designing an original hot or cold pack based on their results and research, and then presenting their design in an "elevator pitch" to a community member.  I was so pleased with my students' collaborative work and creative ideas.  All week long, my colleagues made a point to find me at lunch to tell me how impressed they were with the presenters.  I owe all of my wonderful colleagues a huge thank you for helping make this project relevant for my kids.   I am truly grateful for my supportive colleagues at Pomfret School who will "jump right in" (our favorite catch phrase around here).

The project started in the lab with a calorimetry experiment.  I used the lab from Chemistry You Need to Know by Kelly Dieters, specifically the final chapter project for the Hot and Cold Pack chapter.  This excellent lab has clear instructions for collecting data and researching cost and safety information about sets of chemicals for hot or cold packs.  I divided the class into groups of two or three, and allowed them to chose either a hot or cold pack experiment.  Using their lab results, the students first had to choose the best system for their pack, and them make decisions about size and quantity of the chemicals to obtain the desired temperature for the pack.  They worked as a team to complete calculations and develop a hot or cold pack design.  They were asked to consider safety, cost, and their target market in their designs.  On the second day of the experiment, each group randomly picked a name out of a hat for their final presentation.  They had to make arrangements to meet with their community member outside of class to give them a 3-minute elevator pitch in the hopes of convincing them to fund their new product.

You can take a look at my project details and use them if you like this idea.  Hot and Cold Pack Design Challenge Link.   And here's the lab file I used; an adaptation of Kelly Dieter's lab from her excellent chemistry text book.  Hot and Cold Pack Experiment.

One of the key elements to a successful project is an authentic audience.  The final piece of this design challenge, presenting to a community member, is really what made the whole project a success.  The kids stepped up their game to make a good impression during their pitch.  Here are a few examples of the work they did for the pitch.

Sore No More!

Thermo Pack

One group made a commercial for their product to go along with their presentation.


The only thing I didn't like about this project is that I didn't get to see any of the pitch presentations.  I sent them out into the world with their ideas, and I heard so many enthusiastic comments from my colleagues, but I was left with a little pang in my heart because I missed out on all the action!  Maybe next year I'll have the kids practice during class so I can see them and they will get a chance to hear suggestions from the class before setting off to present to community members.  I would love to hear your feedback on this project and any suggestions for making it better next time.

Thursday, April 23, 2015

PhET is Phabulous!

This week I started a two week unit on atomic structure and spectroscopy.  To kick of this unit, I turned to one of my favorite resources:  PhET Interactive Simulations.  PhET is wonderful resource from the University of Colorado that provides a wide range of science and math simulations.   PhET Website.  The folks at PhET have thought of just about everything.  Their simulations are simple enough to understand the concepts quickly, but true to the correct experimental results.  They have excellent resources for each simulation that are "ready to use" or available for adaptation.  They have a team of teachers who give webinars to help teachers learn many techniques for incorporating the simulations into the classroom.  I like to use one of their simulations for each unit I teach because they offer the students an interactive view of chemistry on the molecular level.  This link includes downloadable file with an overview of the simulations for chemistry and how they integrate with a typical chemistry curriculum.  Chemistry Simulations Aligned to Chemistry Curriculum

 "Build an Atom" was the perfect launching point for my students to review the structure of the atom and master the concept of isotopes.  Link to Build an Atom Simulation.  All of the students learned this information in their physical science classes in middle school, but the review is an important way to put everyone on the same page.

Students create atoms from the buckets of subatomic particles.
What I love about this particular simulation is watching students build their own atoms out of buckets of subatomic particles.  The first thing I asked them to do is play around with the simulation and write down two things they notice.  One student said, "One neutron in the nucleus is not an atom."  I was so excited to hear him say this; it brings up a wonderful question about what actually makes an atom.  The students quickly relate the proton count to the elements in the periodic table.  They can track the mass of the atom as they add particles, and watch the charge change.  This may be the first time this year that some of my students really understood the concept of an ion.  "Build an Atom" is the perfect vehicle to introduce isotopes.  At the end of the day, my students were completely up to speed on the structure of the atom, ions, and isotopes.

"Build an Atom" has several games built into the simulation.  These fun games are a great way for student to check their understanding of the concepts and practice.  Here's a sample question from one of the games, along with the smiley face when I got it right.


Hurray, I got the question right!
Thank you, PhET for making these amazing science simulations and developing excellent resources to go with them.  This powerful tool is a great complement to hands-on laboratory work.

Wednesday, April 15, 2015

NEACT March Meeting

Graph of pressure vs. volume data collected at the workshop.
The March meeting of the New England Association of Chemistry Teachers was a great introduction to the use of modeling in a chemistry classroom.  We had two knowledgable presenters, Sue Kelmmer from Camden Hills Regional High School and Tom Pfeiffer from Bellow Free Academy, who gave us two different sides of the modeling story.

I LOVE these giant white boards.  Each lab table had one in the middle.
Sue started off the morning with a presentation about using particle diagrams to tackle student misconceptions in science class.  She opened the discussion with a modeling probe she used in her classes:  cutting copper probe.  

Consider a length of pure copper wire.  Cut the wire in half and throw away one of the two shorter wires.  Now take the remaining piece of wire and cut that in half, and throw away one piece.  Continue in the same way , each time cutting half of the remaining wire.  Will this process come to an end?  Explain your answer with a diagram.

Each lab table was equipped with large white boards, so we jumped right into the solution for this prompt.  The discussion at my table centered around when (and if) the kids take the diagram from the macroscopic to the atomic/particle level.  Sue presented several diagrams her students had generated from this prompt, which clearly illustrated the range of thinking in her classes and the "ah ha" moments that happened when students took the solution to the atomic and subatomic level.

Sue gave us plenty of great examples demonstrating how and when she incorporates particle diagrams into the curriculum.  She shared some of her favorite resources with the group.  Her "go to" book for formative assessment probes is Uncovering Student Ideas in Science, Volume 1:  25 Formative Assessment Probes by Page Keeley.

Sue Klemmer and Tom Pfeiffer presented their modeling work at the March NEACT meeting.
The second half of the morning was dedicated to a modeling activity of the gas laws.  Tom gave us a brief overview of the modeling learning cycle, which is very different than the particle diagram models you imagine when the word is used.  The modeling technique is popular in both physics and chemistry; you can read more about the technique at the American Modeling Teachers Association website.  Tom is an instructor for the chemistry modeling workshops this summer in Mass. and CT.  The modeling approach involves student exploration of a system, and then the application of the system to solve a problem.  In our case, we conducted three quick experiments to explore the relationships between pressure, volume, temperature, and moles of gas.  We set up each experiment with a Vernier probe and hand held LabQuest device.  These handy devices make for very quick and accurate results.  Tom asked us to plot our group data on the giant white boards; I was happy to use mine again!  The final part of the workshop was reporting our results to the group and discussing the application of the relationships we learned.  Here's where the years of experience in the classroom really became evident as we listened to an interesting discussion about blending the modeling techniques with the particle diagrams.  This one-hour hands-on session made me very interested in signing up for one of the summer courses to learn more about using modeling in the chemistry classroom.  You can find the list of summer workshops here  AMTA Summer Workshops 2015.

Thanks to Tom, Sue, Sawn, Mel, and Mary for hosting this fun and inspiring morning.  I love getting together with fellow chemistry teachers to share ideas and get a boost of excitement about our craft.  At the tail end of a very long and snowy winter, I was very happy to make some new friends and talk science on a Saturday morning.

The next meeting is on May 2nd.  The description of the program from the website:

Join us on the beautiful Regis College campus in Weston, MA to share and comment on your experience with online sources for chemistry education and flipping the chemistry classroom.

I hope that I can clear my calendar to go to this one!  This might be a good distraction for me on the day before I run the Providence Marathon.
Big thanks to Shawn Kenner who coordinated the event.

Mel Govindan is the president-elect of NEACT

Mary Christian-Madden is the current president of NEACT.


Friday, April 10, 2015

Burning Potato Chips for Science

Burning potato chips in the lab in our calorimetry experiment.
There is no better way to teach kids about energy content in food than to burn some in the lab.  Thermochemistry has become one of my new favorite topics to teach because of the many "real world" applications that make the topic relevant and fun.

It is shocking how well the potato chips burn!
I've changed the focus of the unit to a lab based experience with supporting video content that the students watch for homework.   The inquiry cycle works very well in this unit.
This group is working on the Calorimetry POGIL with the mole at the table for help.
The first stop is a calorimetry POGIL, the second phase is measuring J/g for a candle, and the final piece is an inquiry lab to determine how many potato chips must be burned to boil a pot of water.  Each part of the process reinforces the idea of energy transfer.
Measuring the heat content in a candle to learn the calorimetry technique.

The challenge problem for the potato chip experiment is to determine the mass of chips needed to take a cup of water from room temperature to completely boiled away.  This problem forces the kids to consider to energy requirements of the phase change in addition to heating water to the boiling point.  If your curious, it takes about 200 grams of potato chips to boil away a cup of water.